Install and Configure WindML on VxWorks with Tornado 2.2
🧭 1. Introduction #
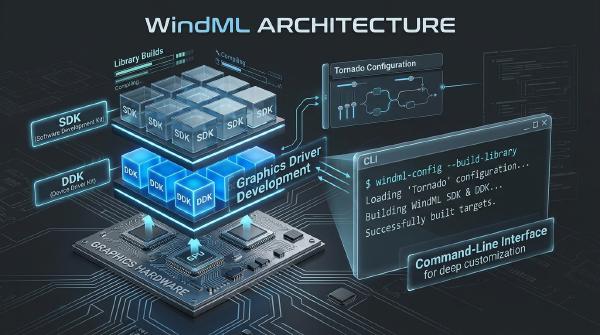
WindML (Wind Media Library) provides graphics and multimedia capabilities for embedded applications running on VxWorks. In legacy development environments, such as Tornado 2.2 with WindML 3.0, developers can use WindML to initialize display hardware, render graphics, and process input from keyboards and pointing devices.
This tutorial demonstrates how to install and configure WindML for a PC Pentium target, commonly operated in a VMware virtual machine. It covers BSP configuration, WindML library compilation, VxWorks image configuration, and execution of the ugldemo sample application.
The workflow consists of five main stages:
- Install WindML into the existing Tornado 2.2 development environment.
- Enable WindML and the required PS/2 input drivers in the PC Pentium BSP.
- Configure and build WindML for a 640 × 480 VGA display using indexed color.
- Include the required graphics and input components in the VxWorks image.
- Download and execute
ugldemoto verify that WindML initializes successfully.
The expected result is the Welcome to WindML 3.0 screen displayed by the target.
The examples use the following installation directory:
D:\Tornado2.2
Adjust the drive letter and directory paths to match your development environment.
This tutorial describes a legacy Tornado and WindML configuration. Configuration macros, driver names, library paths, and build procedures may differ across VxWorks and WindML releases. Use the files and component definitions supplied with your installed version.
📦 2. Installing WindML #
Install the WindML package into the existing Tornado 2.2 environment.
After installation, the Tornado development environment should provide the Tools → WindML menu, which gives access to the WindML configuration and build utilities.

Verify that the installation completed successfully and that the expected WindML configuration files, libraries, and graphics components are available before proceeding.
Installing WindML does not automatically enable it in the BSP or include all required components in the VxWorks image. The BSP configuration, WindML library configuration, and image components must be configured consistently.
⚙️ 3. Configuring WindML for the PC Pentium Target #
The configuration process involves three related areas: BSP settings, WindML device configuration, and VxWorks image components.
3.1 Enabling WindML in config.h
#
Open the PC Pentium BSP configuration header:
D:\Tornado2.2\target\config\pcPentium\config.hLocate the following include directive:
#include "pc.h"Immediately after it, add these definitions:
#define INCLUDE_WINDML
#define INCLUDE_WINDML_PS2_POINTER
#define INCLUDE_WINDML_PS2_KEYBOARD
Each macro enables a specific part of the WindML integration.
| Macro | Purpose |
|---|---|
INCLUDE_WINDML |
Enables WindML support in the PC Pentium BSP configuration. |
INCLUDE_WINDML_PS2_POINTER |
Enables the PS/2 pointing-device driver used by the WindML configuration. |
INCLUDE_WINDML_PS2_KEYBOARD |
Enables the PS/2 keyboard driver required for keyboard input. |
The keyboard device name configured later in WindML is /pcConsole/0. This name must correspond to the input-device configuration supported by the installed BSP and WindML implementation.
After modifying config.h, rebuild the bootrom and ensure that the target boots using the regenerated image. Changes to the BSP header do not affect an already-built bootrom.
Keep the BSP configuration aligned with the selected graphics and input drivers throughout the remaining steps.
3.2 Selecting the WindML Configuration #
Restart Tornado if necessary, then open the WindML configuration utility:
Tools → WindML → WindML Configuration
Select the following configuration:
Pentium_VGA_INDEXED4_640×480
This configuration targets the Pentium BSP and specifies a 640 × 480 VGA display using a 4-bit indexed-color frame buffer.

Click Configure to open the device and display configuration dialog.


Verify the display and input-device settings before saving or building the configuration.
Do not select a different processor, graphics driver, or color-depth configuration unless the BSP and VxWorks image are configured to support it.
3.3 Configuring the Keyboard Device Name #
In the WindML configuration dialog, set Keyboard Name to:
/pcConsole/0
The device name identifies the keyboard interface that WindML uses for input. In this configuration, it must match the intended PC console keyboard interface.
A mismatch between the configured device name and the available input-device implementation can prevent the application from receiving keyboard events, even when the graphics display initializes successfully.
Before proceeding, verify the following settings:
- BSP: PC Pentium.
- WindML configuration:
Pentium_VGA_INDEXED4_640×480. - Keyboard Name:
/pcConsole/0.
Once the settings are correct, close the configuration dialog.
3.4 Cleaning and Building WindML #
Before compiling the library, select the Clean operation to remove the generated build artifacts associated with the selected target.
Cleaning is particularly important when changing graphics drivers, color depths, or device configurations. It helps prevent stale objects from a previous configuration from being reused.
After cleaning, click Build to compile WindML.

The original environment typically takes approximately 10 minutes to complete the build, although the actual duration depends on the host machine, toolchain, and selected build options.
After the build completes, verify that no compilation or linking errors occurred and that the expected libraries or object files were generated.
🖥️ 4. Configuring the VxWorks Image #
After building WindML, configure the VxWorks image to include the device drivers and graphics libraries required by ugldemo.
The BSP macros enable the relevant integration, but the running VxWorks image must also contain the components needed to initialize the display and execute the demo.
4.1 Creating a Downloadable Project #
Create a Downloadable Project in Tornado.
The downloadable project is used to load and execute the WindML demo object on the running VxWorks target. In this workflow, ugldemo.o is downloaded after the VxWorks image boots rather than being linked directly into the bootrom.
4.2 Adding the Required Components #
Add the following components to the project:
- PS2 keyboard
- WindML graphics support (PCI device)
- complete 2D library

Each component serves a different purpose.
PS2 keyboard provides the input-driver support corresponding to INCLUDE_WINDML_PS2_KEYBOARD.
WindML graphics support (PCI device) supplies the graphics-driver support for the configured PC target.
complete 2D library provides the two-dimensional graphics APIs required by the demo.
Ensure that the selected components are available in the installed Tornado and VxWorks release. Component names may vary between environments.
Missing or incompatible graphics components can allow the system to boot successfully while preventing WindML applications from opening a display or rendering graphics.
4.3 Rebuilding the VxWorks Image #
After selecting the required components, rebuild the VxWorks image.
Copy the resulting image to the location expected by the bootrom. For example, the image may be placed directly under:
D:\Use the actual image filename and destination specified by your boot configuration.
If the bootrom must also be updated to reflect the BSP changes made earlier, rebuild it and verify that its boot parameters point to the correct image.
Before starting the virtual machine, confirm that the bootrom and VxWorks image correspond to the same target configuration and that the network boot settings identify the intended image file.
4.4 Starting the FTP Server and VMware Target #
Start the Tornado FTP Server and verify that it serves the VxWorks image required by the bootrom.
Then start VMware and power on the virtual machine containing the PC Pentium target.
The expected boot sequence is:
- VMware starts the virtual machine.
- The target boots using the configured bootrom.
- The bootrom obtains the VxWorks image through the configured network-boot mechanism.
- VxWorks starts with the WindML-related components included in the image.
In the described setup, the FTP server must be running before the virtual machine starts, and the image copied in the previous step must be the one requested by the bootrom.
Check the boot messages for network-boot failures or image-loading errors before attempting to download the demo.
🚀 5. Downloading and Running ugldemo
#
The ugldemo sample application provides a practical way to verify the WindML graphics configuration.
Once the VxWorks image has booted successfully and the target is connected to Tornado, download the demo object and execute its entry point.
5.1 Connecting the Target Server #
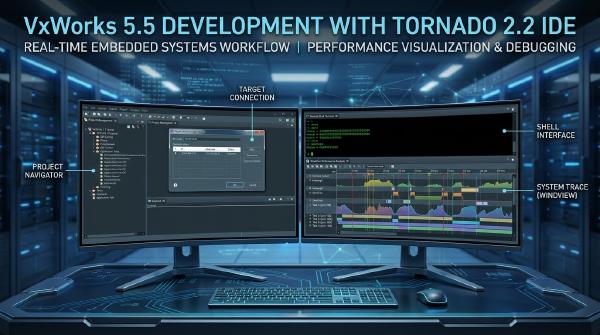
In Tornado, start the Target Server and connect it to the running virtual-machine target.
Confirm that the target is reachable and that the target server is connected to the instance that booted the newly configured VxWorks image.
A successful boot alone does not confirm that the correct image is running. Verify the target connection before downloading the application.
5.2 Downloading ugldemo.o
#
Use Tornado’s download interface to load the following object file:
D:\Tornado2.2\target\lib\objPENTIUMgnuApps\ugldemo.o
This path identifies the demo object built for the Pentium GNU toolchain in the described installation.
The object must be compatible with the target architecture, toolchain, and WindML libraries available in the running image.
Wait for the download operation to complete successfully before executing the demo. If the download fails, check target-server connectivity, file availability, symbol compatibility, and the build output.
5.3 Launching the Demo #
After downloading the object, open Launch Shell in Tornado.

Invoke the demo entry point exported by the downloaded object, using the name provided by the installed sample and its symbol table.
If the demo is exposed through a callable entry point named ugldemo, invoke that function from the shell. Follow the entry-point conventions of the installed sample if the exported symbol differs.
The demo should initialize the configured graphics subsystem and display the WindML welcome screen.
5.4 Verifying Successful Execution #
Observe the VxWorks session inside the virtual machine.
A successful run displays:
Welcome to WindML 3.0

This screen confirms that the demo reached its display-rendering path under the configured environment.
If the expected screen does not appear, work through the configuration and execution chain in order rather than changing multiple settings simultaneously.
5.5 Troubleshooting Common Problems #
WindML graphics do not initialize #
Verify that INCLUDE_WINDML is defined in the PC Pentium BSP configuration and that the required WindML graphics components were included in the image.
Confirm that the bootrom and VxWorks image were rebuilt after their respective configuration changes.
Keyboard input does not work #
Check that INCLUDE_WINDML_PS2_KEYBOARD is enabled and that Keyboard Name is set to /pcConsole/0.
Also verify that the keyboard driver is present in the running image and that the configured device name matches the available driver interface.
The target boots but no graphics appear #
Confirm that the image includes WindML graphics support (PCI device) and complete 2D library.
Verify that Pentium_VGA_INDEXED4_640×480 is selected and that the display configuration matches the PC Pentium target.
Review the target boot messages and WindML initialization output for graphics-driver or device-initialization errors.
WindML compilation or linking fails #
Run Clean and rebuild the selected WindML target.
Check that the chosen configuration is consistent with the installed BSP, graphics driver, processor architecture, and toolchain. Examine missing-symbol or unresolved-reference errors to identify unavailable components or incompatible libraries.
The demo object cannot be downloaded or executed #
Confirm that the Target Server is connected to the correct virtual-machine instance and that ugldemo.o exists at the configured path.
Verify that the object was built for the Pentium GNU toolchain and is compatible with the WindML components in the running image.
If the object downloads successfully but the demo does not execute, inspect the exported symbols, runtime errors, and WindML initialization messages to identify whether the problem occurs during entry-point invocation or graphics initialization.
📋 6. Configuration Quick Reference #
The following table summarizes the principal settings used in this tutorial.
| Item | Configuration |
|---|---|
| Development environment | Tornado 2.2 |
| Target BSP | PC Pentium |
| WindML version | WindML 3.0 |
| BSP header | D:\Tornado2.2\target\config\pcPentium\config.h |
| Required BSP macros | INCLUDE_WINDML, INCLUDE_WINDML_PS2_POINTER, INCLUDE_WINDML_PS2_KEYBOARD |
| Configuration menu | Tools → WindML → WindML Configuration |
| WindML configuration | Pentium_VGA_INDEXED4_640×480 |
| Display mode | 640 × 480 VGA, 4-bit indexed color |
| Keyboard device name | /pcConsole/0 |
| Required image components | PS2 keyboard, WindML graphics support (PCI device), complete 2D library |
| Demo object | D:\Tornado2.2\target\lib\objPENTIUMgnuApps\ugldemo.o |
| Expected result | Welcome to WindML 3.0 |
🔗 7. Related WindML Resources #
For additional examples covering legacy graphics development and later WindML configurations, see these related resources:
- Setting Up OpenGL Graphics Development in VxWorks — related legacy graphics-development guidance for Tornado-era environments.
- Configuring WindML 5.3 on VxWorks 6.9 — an example of configuring WindML in a later VxWorks development environment.
These resources describe different software versions and workflows. Do not assume that configuration macros, graphics components, or build instructions are interchangeable across releases.
✅ 8. Conclusion #
Installing and configuring WindML on VxWorks with Tornado 2.2 requires coordinated changes to the development environment, BSP, graphics configuration, and VxWorks image.
The essential steps are to install WindML, enable the required BSP macros, configure the Pentium_VGA_INDEXED4_640×480 display, set the keyboard device name to /pcConsole/0, and rebuild the configured library. The VxWorks image must then include the appropriate PS/2 keyboard, PCI graphics, and 2D graphics components before the ugldemo object is downloaded and executed.
When the BSP, bootrom, image, and downloadable object are compatible, the target should display the Welcome to WindML 3.0 screen.
Following this sequence makes it easier to isolate configuration problems and provides a repeatable baseline for validating graphics initialization in a legacy VxWorks development environment.