- 说明
- 点击数:5362

1. First check the Linux kernel version on the target board with the following command:
uname -r
It must be 3.16.0 or above.
2. Make sure the serial ports are initialized properly in the kernel by running command:
dmesg | grep tty
You should see something similar to the following:
[ 0.000000] console [tty0] enabled
[ 2.159659] 0000:00:1e.3: ttyS0 at MMIO 0xd0820000 (irq = 18, base_baud = 2764800) is a 16550A
[ 2.160221] 0000:00:1e.4: ttyS1 at MMIO 0xd081e000 (irq = 19, base_baud = 2764800) is a 16550A
On 32 bit Ubuntu 14.04.2 there may be a message “failed to request DMA” but it should be OK. Serial ports should still work. Note: It is important that the user checks kernel version and serial port names with commands in steps 1 & 2 before setting up Minicom. Normally, the port names show up as ttyS0 & ttyS1, but on Ubuntu 14.04.2 they are ttyS4 & ttyS5
3. Start Minicom with the following command:
sudo minicom –s
If Minicom is not already installed, install it with command:
sudo apt-get install minicom
- 说明
- 点击数:17033
As we all know, most of the devices are treated as files in Linux, so is the UART for which I will give some introduction about the programming, the operations on UART are the same as the operations on files.
1. Steps about the UART programming in Linux
- Open the UART
- Initialize the UART
- Read from or Write to the UART
- Close the UART
2. Open the UART
Since the UART is treated as file, we must open the file before any other operation is done on the file.
2.1 device name
In linux, the UART device is accessed through the device file of UART device, which means we access the UART device by accessing the device files(e.g. /dev/ttyS0, /dev/ttyS1, /dev/ttyS2)
2.2 options
Call the Open() function to open the UART device, we need to use the parameter "O_NOCTTY" when opening the UART device. O_NOCTTY: It means we have opened one terminal device, the program will not become the controlling terminal of this port, if this parameter is not used, any input will affect the process of the system. O_NDELAY: It means we don't care the status of the UART's DCD signal.
2.3. Steps of opening the UART
2.3.1 open()
Open the UART by calling the function Open(), the returned value is the file descriptor.
2.3.2 fcntl()
Get the status of the UART, make sure whether the mode is blocked or not.
2.3.3 isatty()
Test whether the opened file descriptor is terminal device or not.
2.3.4 Function
int UART0_Open(int fd, char *port)
{
	fd = open(port, O_RDWR|O_NOCTTY|O_NDELAY);
	if(fd==FALSE)
	{
		perror("Can't open the serial port\n");
		return(FALSE);
	}
	if(fcntl(fd, F_SETFL, 0)<0)
	{
		printf("Fcntl failed\n");
		return(FALSE);
	}
	else
	{
		printf("Fcntl=%d\n", fcntl(fd,F_SETFL,0));
	}
	if(isatty(STDIN_FILENO)==0)
	{
		printf("Standard input is not a terminal device\n");
		return(FALSE);
	}
	else
	{
		printf("Isatty success\n");
	}
	printf("fd->open=%d\n", fd);
	return(fd);
}
3. Initialize the UART
- 说明
- 点击数:2984
这里的技术技巧最初是来自谷歌的“Testing on the Toilet” (TOTT)。这里是一个修订和扩增版本。
脚本安全
我的所有bash脚本都以下面几句为开场白:
#!/bin/bash
set -o nounset
set -o errexit
这样做会避免两种常见的问题:
- 引用未定义的变量(缺省值为“”)
- 执行失败的命令被忽略
需要注意的是,有些Linux命令的某些参数可以强制忽略发生的错误,例如“mkdir -p” 和 “rm -f”。
还要注意的是,在“errexit”模式下,虽然能有效的捕捉错误,但并不能捕捉全部失败的命令,在某些情况下,一些失败的命令是无法检测到的。(更多细节请参考这个帖子。)
脚本函数
在bash里你可以定义函数,它们就跟其它命令一样,可以随意的使用;它们能让你的脚本更具可读性:
ExtractBashComments() {
   egrep "^#"
}
cat myscript.sh | ExtractBashComments | wc
comments=$(ExtractBashComments < myscript.sh)
还有一些例子:
SumLines() {
# iterating over stdin - similar to awk
  local sum=0
  local line=””
  while read line ; do
      sum=$((${sum} + ${line}))
  done
  echo ${sum}
}

SumLines < data_one_number_per_line.txt

log() {
# classic logger
 local prefix="[$(date +%Y/%m/%d\ %H:%M:%S)]: "
 echo "${prefix} $@" >&2
}

log "INFO" "a message"
尽可能的把你的bash代码移入到函数里,仅把全局变量、常量和对“main”调用的语句放在最外层。
变量注解
Bash里可以对变量进行有限的注解。最重要的两个注解是:
- local(函数内部变量)
- readonly(只读变量)
# a useful idiom: DEFAULT_VAL can be overwritten
#       with an environment variable of the same name
readonly DEFAULT_VAL=${DEFAULT_VAL:-7}

myfunc() {
# initialize a local variable with the global default
  local some_var=${DEFAULT_VAL}
  ...
}
这样,你可以将一个以前不是只读变量的变量声明成只读变量:
- 说明
- 点击数:3009
通过这 10 个基础命令开始掌握 Linux 命令行。
你可能认为你是 Linux 新手,但实际上并不是。全球互联网用户有 3.74 亿,他们都以某种方式使用 Linux,因为 Linux 服务器占据了互联网的 90%。大多数现代路由器运行 Linux 或 Unix,TOP500 超级计算机也依赖于 Linux。如果你拥有一台 Android 智能手机,那么你的操作系统就是由 Linux 内核构建的。
换句话说,Linux 无处不在。
但是使用基于 Linux 的技术和使用 Linux 本身是有区别的。如果你对 Linux 感兴趣,但是一直在使用 PC 或者 Mac 桌面,你可能想知道你需要知道什么才能使用 Linux 命令行接口(CLI),那么你来到了正确的地方。
下面是你需要知道的基本的 Linux 命令。每一个都很简单,也很容易记住。换句话说,你不必成为比尔盖茨就能理解它们。

1、 ls
你可能会想:“这是(is)什么东西?”不,那不是一个印刷错误 —— 我真的打算输入一个小写的 l。ls,或者说 “list”, 是你需要知道的使用 Linux CLI 的第一个命令。这个 list 命令在 Linux 终端中运行,以显示在存放在相应文件系统下的所有主要目录。例如,这个命令:
ls /applications
显示存储在 applications 文件夹下的每个文件夹,你将使用它来查看文件、文件夹和目录。
显示所有隐藏的文件都可以使用命令 ls -a
2、 cd
这个命令是你用来跳转(或“更改”)到一个目录的。它指导你如何从一个文件夹导航到另一个文件夹。假设你位于 Downloads 文件夹中,但你想到名为 Gym Playlist 的文件夹中,简单地输入 cd Gym Playlist 将不起作用,因为 shell 不会识别它,并会报告你正在查找的文件夹不存在。要跳转到那个文件夹,你需要包含一个反斜杠。改命令如下所示:
cd Gym\ Playlist
要从当前文件夹返回到上一个文件夹,你可以在该文件夹输入cd ..。把这两个点想象成一个后退按钮。
3、 mv
该命令将文件从一个文件夹转移到另一个文件夹;mv 代表“移动”。你可以使用这个简单的命令,就像你把一个文件拖到 PC 上的一个文件夹一样。
例如,如果我想创建一个名为 testfile 的文件来演示所有基本的 Linux 命令,并且我想将它移动到我的 Documents 文件夹中,我将输入这个命令:
mv /home/sam/testfile /home/sam/Documents/
命令的第一部分(mv)说我想移动一个文件,第二部分(home/sam/testfile)表示我想移动的文件,第三部分(/home/sam/Documents/)表示我希望传输文件的位置。
4、 快捷键
- 说明
- 点击数:6506
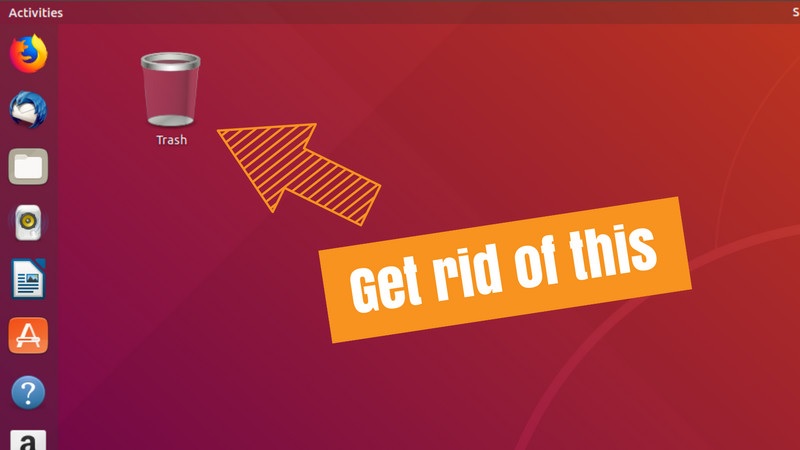
这个快速小窍门会演示如何从Ubuntu 17.10和18.04的桌面上移除回收站图标,会讨论图形和命令行两种方法。
从Ubuntu 17.10开始,Canonical使用了一个客制化的GNONE桌面作为默认的桌面环境。这个客制化的版本和之前使用的默认的桌面环境Unity很相似。
虽然我发现新的Gnome桌面是非常好,但我不喜欢其中的一点,就是桌面的回收站的图标,这让我想起来在Windows XP时代,在桌面上有一个回收站图标,但是没有直接的移除它的方法。
Ubuntu 18.04和17.10是差不多一样的,在系统的默认设置里面是找不到隐藏这个回收站图标的选项的。
那么如何移除回收站的图标呢?Gnome Tweaks工具可以帮到忙!
使用GNOME Tweaks工具来从桌面移除回收站图标
如果你还没有安装它的话,你需要安装它,因为Gnome Tweaks工具可以让你细微调整你的系统,包括在Ubuntu 18.04里面安装新的主题,我不能够想象没有这个工具会是什么状态。
你可以从软件中心找到它,直接搜索它:
微信公众号

© 2026 VxWorks Club